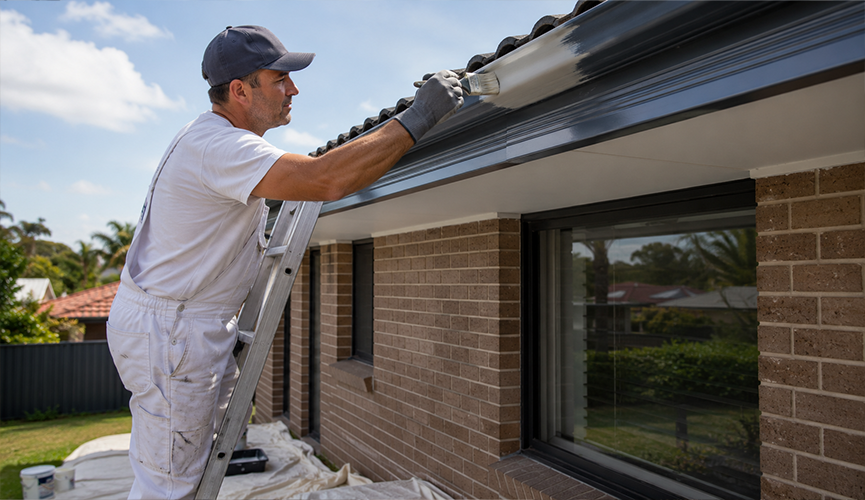
Faded, peeling, or weathered rooflines can instantly drag down the street appeal of an otherwise beautiful home. If you are looking at your tired roofline and wondering how to paint gutters to restore your home’s exterior charm, you are in the right place. While many national paint brands or roofing contractors might suggest the job is too complex for a homeowner, painting your gutters is a highly rewarding, cost-effective DIY project. With the right safety measures, systematic preparation, and trade-approved application techniques, you can achieve a durable, factory-like finish that protects your home for years to come.
Is Painting House Gutters Worth It? (Cost vs. Replacement)
Before rolling up your sleeves, it is natural to ask: is repainting gutters actually worth the effort, or should you just replace them entirely?
For most homes, a full gutter profile replacement is a major capital expense, often running into thousands of dollars for materials and professional labor. In contrast, choosing to invest a weekend into painting gutters costs only a fraction of that price—requiring just a few premium tins of paint, primer, and basic preparation tools.
Beyond the immediate cosmetic upgrade, a fresh, high-quality topcoat serves as a critical defensive barrier. It seals the substrate against moisture, halts early-stage oxidation, and prevents structural rust from eating through the metal.
Cost vs. Value Breakdown
- Full Replacement (High Cost): Costs thousands of dollars in new materials and professional roof plumbing labor.
- DIY Repainting (Low Cost): Costs only a fraction of replacement, requiring just paint, primer, and basic prep tools.
- Long-Term Protection: A fresh exterior topcoat seals the metal against rain, prevents rust, and stops corrosion in its tracks.
If your gutters are structurally sound, free of sagging, and do not have major water-pooling issues, a DIY repaint is undoubtedly the smartest financial move. To further extend the lifespan of your newly painted system, keeping heavy debris out is essential. Installing a high-quality gutter guard adelaide from a professional gutter guard company adelaide prevents leaf accumulation, eliminates water pooling, and stops wet organic matter from rotting your fresh paint job from the inside out.
Gutter Material Guide: Colorbond, Aluminium, and PVC
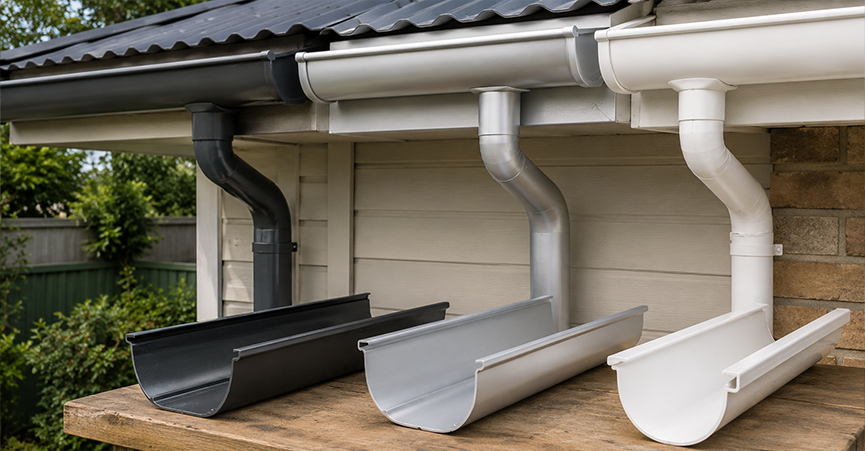
The secret to a paint job that survives harsh Australian conditions lies in knowing what material you are working on. The exact process of how to paint rain gutters changes significantly depending on whether your roofline features steel, aluminium, or vinyl (PVC).
To figure out exactly what material is installed on your roof, use the simple magnet test:
- Steel / Colorbond: A standard fridge magnet will stick firmly to the surface.
- Aluminium or PVC: A magnet will not stick at all. You can easily tell PVC apart from aluminium by its warmth, flexibility, and lack of metallic clinking when tapped with a fingernail.
Once you have identified the material, tailor your approach:
- Colorbond & Steel: These materials require thorough de-shining (scuffing the slick factory surface) and immediate rust treatment on any exposed bare metal spots.
- Aluminium: Aluminium does not rust in the traditional red sense, but it does oxidize, leaving a fine white powder. It requires specialized etch priming on any bare patches to ensure the paint clings chemically.
- PVC / Vinyl: Plastic expands and contracts aggressively with daily temperature swings. If you are painting house gutters made of PVC, skip the metal rust-inhibitors and use a dedicated plastic adhesion primer to avoid cracking and peeling.
What You’ll Need: The Essential Materials Checklist
To get professional-grade results, do not cut corners on your supplies. Use this comprehensive checklist to gather everything before heading up the ladder:
| Tool / Material | Recommended Type / Specification | Purpose |
| Cleaning Agent | Premium Sugar Soap or specialized Eco-wash | Removes heavy grease, atmospheric grime, coastal salt deposits, and chalky oxidation |
| Abrasive Pad | Heavy-duty Scotch-Brite pad or fine wire brush | Scrubs away loose, chalky paint film and prepares the surface |
| Sandpaper | 180-grit to 240-grit wet & dry sandpaper | Feathers out peeling paint edges and scuffs the surface to create a paint grip |
| Primer | Metal Etch Primer (for steel/aluminium) or Plastic Adhesion Primer (for PVC) | Prevents corrosion and guarantees maximum chemical bonding for the topcoat |
| Topcoat Paint | Premium exterior self-priming acrylic (e.g., Wattyl Solagard or Dulux Weathershield) | Provides high UV resistance, weatherproofing, and flexibility |
| Paint Brush | 50mm to 75mm angled sash cutter brush | Allows for precision cutting along roof tiles and clean edges |
| Safety Gear | Safety glasses, dust mask, gloves, and sturdy closed-toed footwear | Protects you from cleaning chemicals, sanding dust, and physical hazards |
Safety First: Preparing for Working at Heights
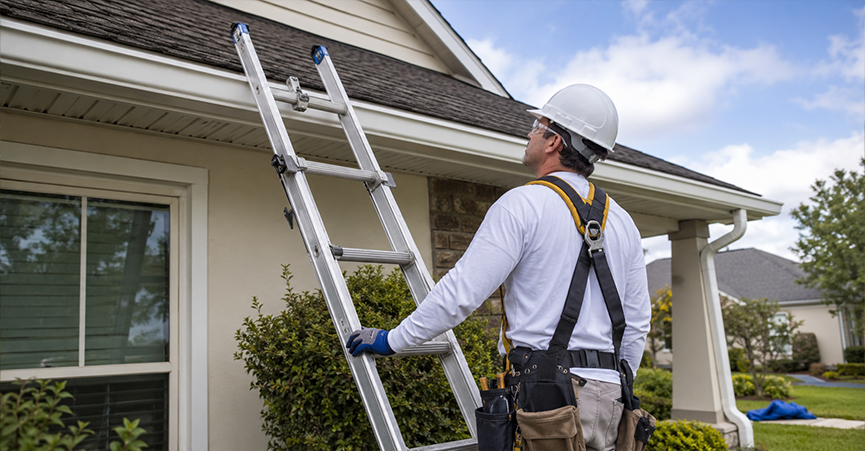
Painting your gutters requires spending long stretches on a ladder. Before opening a single tin of paint, build a safe work setup to prevent avoidable accidents
- Inspect Your Ladder: Use a sturdy, industrial-rated A-frame or extension ladder. Always set it up on firm, level ground. If you are working on soft soil or grass, place a thick, wide wooden plank underneath the feet to prevent sinking.
- The 4-to-1 Rule: For every 4 meters of vertical height, the base of your extension ladder should be placed 1 meter away from the wall.
- Maintain Three Points of Contact: Always keep either two feet and one hand, or two hands and one foot, firmly on the ladder at all times. Never overreach—your belt buckle should never go past the side rails. If you cannot comfortably reach a section, climb down and move the ladder.
- Protect Your Gutter Profiles: Leaning an extension ladder directly against thin metal gutters can bend, scratch, or dent them. Use a rubber ladder stand-off or stabilizer bracket. This keeps the ladder away from the gutter face, protecting your roofline and giving you a safer, wider workspace.
- Scan for Overhead Hazards: Always look up and identify any incoming overhead power lines. Keep your ladder and all metal tools at least 3 meters away from live electrical wires.
Step-by-Step Guide: How to Repaint Gutters for a Flawless Finish
With your safety measures in place and your materials sorted, it is time to tackle the actual painting process. Here is a clear, step-by-step breakdown of how to repaint gutters to ensure your new finish lasts for years.
Step 1: Deep Cleaning and Treating Powdery Residue
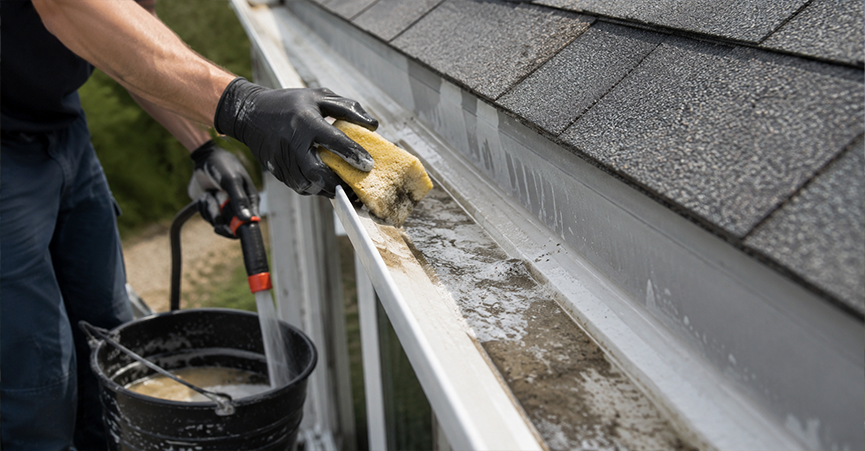
The primary reason DIY paint jobs peel within the first year is poor cleaning. Over years of exposure, gutter paint breaks down under intense sunlight, leaving a fine, chalky, white oxidized film. If you paint directly over this chalky layer, the new coat will stick to the loose powder instead of the actual gutter, leading to rapid peeling.
- The Wash Down: Mix a strong solution of premium sugar soap and warm water.
- The Scrub: Using a heavy-duty Scotch-Brite pad, vigorously scrub the outer face, the top lips, and the hard-to-reach underside of the gutter. This removes dirt, airborne oils, and salt build-up.
- The Clean Finger Metric: Continue scrubbing and flushing the gutters with clean water until you can wipe a clean, dry finger across the dry surface and see absolutely no white, powdery residue transfer to your skin.
- Dry Completely: Allow the entire roofline to dry thoroughly before proceeding to the next step.
The “Clean Finger” Test Flow
- Scrub: Clean the surface with sugar soap and a heavy-duty Scotch-Brite pad.
- Rinse: Flush away all soap and grime with clean water, then let it dry.
- Wipe: Firmly rub a clean, dry finger across the gutter face.
- FAIL (Powder on finger): Old paint is still chalking. Repeat Step 1.
- PASS (No powder on finger): The surface is completely stable. Proceed to Step 2.
Step 2: Sanding, Scraping, and Managing Rust
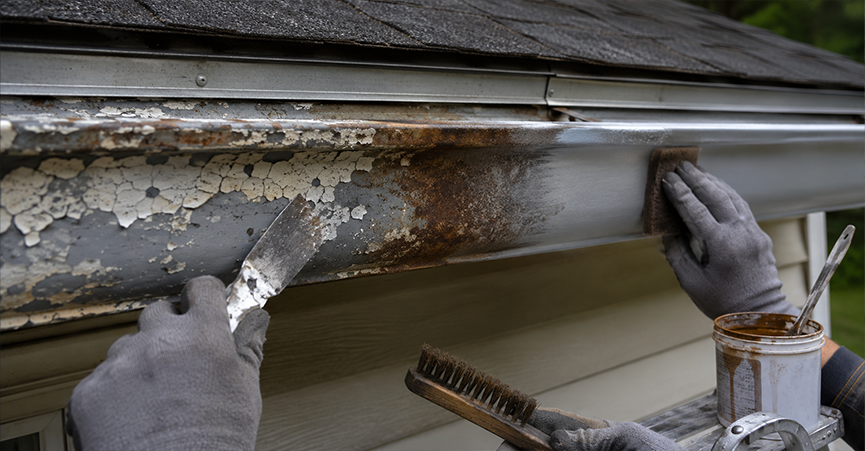
Once dry, you need to create a physical “grip” on the surface and address any damaged areas.
- Scrape and Edge-Feathering: Use a high-quality paint scraper to remove any old, flaking, or bubbled paint. Next, use 180-grit to 240-grit wet and dry sandpaper to sand the entire gutter surface lightly. Pay special attention to the areas where old paint met bare metal; sand these edges until they are perfectly smooth and “feathered” out, ensuring no sharp ridges remain.
- Treating Rust Patches: If you have steel gutters with localized spots of red rust, sand them back to bare metal with a wire brush. Immediately apply a rust converter to these patches. The converter chemically changes iron oxide into a stable, paintable barrier.
- The Final Wipe: Use a damp microfiber rag to wipe away all fine sanding dust. Let the surface dry completely.
Step 3: Choosing and Applying the Right Primer
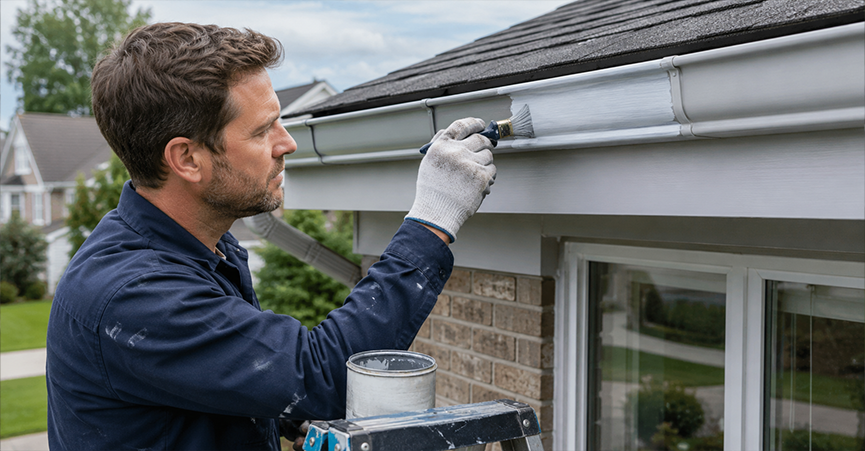
Applying the right primer acts as a bridge between the raw gutter surface and your premium topcoat.
- Bare Steel & Colorbond: Apply a dedicated rust-inhibiting metal primer or zinc-phosphate etch primer over any bare metal patches or rust-treated areas.
- Bare Aluminium: Apply a single coat of specialized metal etch primer to chemically bite into the slick aluminium surface.
- PVC / Plastic: If you are working on vinyl, apply a thin, even coat of a specialty plastic adhesion primer.
Note: If your existing paint is in excellent, non-peeling condition and you have simply scuffed it down, you can often skip spot-priming and go straight to using a premium self-priming exterior acrylic topcoat. However, any bare spot larger than a five-cent piece must be primed.
Step 4: The Best Brush Techniques for Painting Gutters
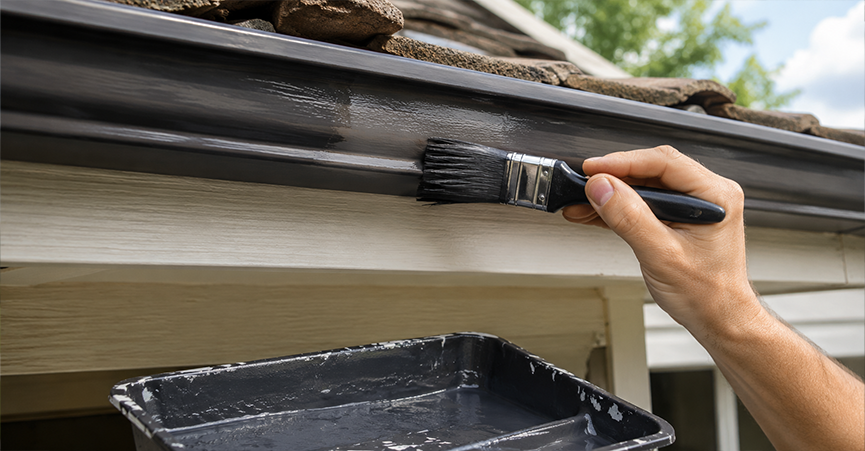
Now comes the most rewarding part: applying the color. For DIYers working on ladders, a high-quality 50mm to 75mm angled sash paintbrush is much safer and more accurate than a roller or spray gun.
- Work Section by Section: Divide your roofline into manageable, bite-sized sections (typically working from one bracket or join to the next).
- Paint the Underside First: Always paint the bottom lip and the underside of the gutter first. By coating the bottom first, you can easily brush out and smooth away any unsightly drips that run down onto the main face when you coat the front.
- The “Laying Off” Technique: Dip your brush about a third of the way into the paint. Apply the paint horizontally with steady strokes. To get a smooth, brush-mark-free finish, use the trade trick of “laying off.” This involves gently dragging a clean, unloaded paint brush horizontally back through the wet paint film you just applied. This flattens out any ridges, yielding a smooth, factory-grade finish.
- Apply a Second Coat: Allow the paint to dry for at least 2 hours (or according to the manufacturer’s instructions) before applying a second coat to ensure complete weatherproofing and deep color consistency.
Double Impact: Tips for Painting Gutters and Fascia Simultaneously
If you are updating your gutters, you should consider painting gutters and fascia at the same time. The fascia boards (the vertical timber or metal bands sitting directly behind your gutters) frame your roofline and complete your home’s visual border.
- Check the Materials: Many older Australian homes have timber fascia boards paired with metal gutters. If your timber fascias are cracked or weathered, fill any deep holes with a premium exterior timber filler and apply an exterior wood primer before painting.
- Mind the Brackets: Gutter brackets hold the system to the fascia. Avoid slapping thick coats of paint inside the brackets, as this can trap moisture and cause early timber rot or metal corrosion. Use a small, precise brush to paint around them cleanly.
- Use Quality Painter’s Tape: Apply high-quality blue painter’s tape along the seam where the back of the gutter meets the fascia to ensure crisp, clean paint lines and prevent messy color overlap.
- Coordinate Color Schemes: Modern Australian exterior designs often utilize popular Colorbond color matching. You can paint both the gutters and fascia in a single dark, cohesive shade like Monument or Woodland Grey to create a modern, low-profile roof frame. Alternatively, paint the fascia in a crisp, lighter tone like Surfmist to contrast beautifully with a dark gutter line.
Pro-Tips: How to Paint Eavestroughs and Downpipes Without the Mess
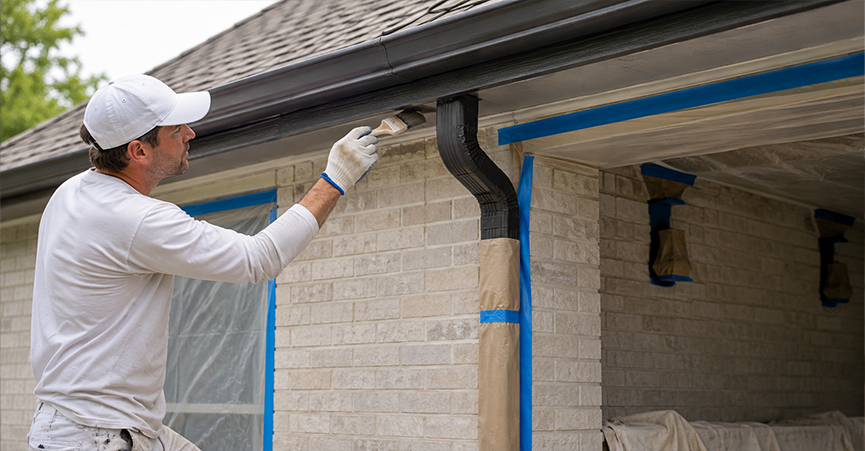
Whether you call them rain channels, gutters, or are searching internationally for how to paint eavestroughs, the exact same principles apply. However, downpipes require a slightly different approach to keep your property clean.
- Clean the Base: Downpipes catch a lot of mud and splashback from garden beds. Clean the bottom half thoroughly before painting.
- Paint Vertically: Always paint downpipes vertically, working from the top down. Use long, smooth, vertical strokes to prevent ugly horizontal paint lines.
- Protect Your Masonry: Slip a thick piece of cardboard or plastic sheeting behind the downpipe and its brackets. This cardboard shield lets you paint the sides of the metal downpipe quickly without getting paint splatters onto your external brickwork, render, or paths.
- Use Drop Sheets: Always spread heavy-canvas drop sheets on the ground directly below your work area to catch any unexpected drips.
Adelaide Climate Watch: The Best Weather Windows for External Painting
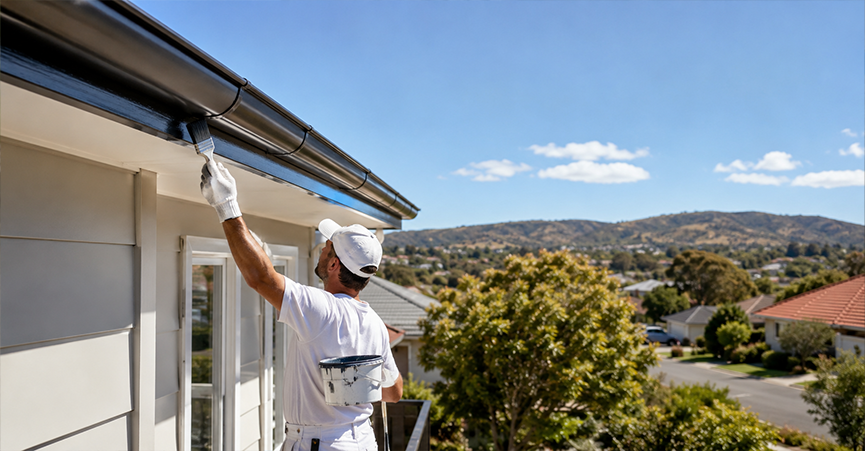
Adelaide’s Mediterranean climate—characterized by mild, wet winters and searing, bone-dry summers—presents unique challenges for exterior painting.
Adelaide Sun Alert: Why Avoid >30°C Days?
- The Heat Problem: Extremely hot metal causes water-based paint to dry almost instantly on contact.
- The Result: The brush will bind and drag, leaving heavy texture marks and causing the paint to peel prematurely.
- The Solution: Paint in the cool early morning or during mild spring and autumn days when the metal is cool to the touch.
- The Best Seasons: Plan your gutter painting project for the mid-autumn (March to May) or spring (September to November) months, when daily temperatures average a comfortable 18°C to 24°C.
- The Best Time of Day: If you must paint during warmer periods, work in the early morning. Follow the sun around your home so that you are always painting in the shade, ensuring the gutter metal is cool to the touch.
- Be Mindful of Coastal Salt: If you live near Adelaide’s coastal suburbs (like Glenelg, Brighton, or Port Noarlunga), afternoon sea breezes deposit fine salt on your roofline daily. Wash down and paint your cleaned gutters within 24 hours to prevent salt deposits from getting trapped beneath your new paint film.
Frequently Asked Questions About Painting Gutters
Can you paint over existing Colorbond gutters?
Yes, as long as the factory finish is clean, sound, and has been lightly sanded to remove the slick factory sheen and any chalky oxidation.
What kind of paint is best for exterior gutters?
Premium, 100% water-based exterior acrylic paint is ideal because it remains highly flexible, allowing it to expand and contract with the metal under changing weather conditions.
Do I really need to sand gutters before repainting gutters?
Yes, sanding is essential because it breaks down the slickness of the old surface to create a mechanical grip that prevents the new paint from peeling.
Should I use a brush, roller, or spray gun?
An angled sash paintbrush is the safest and most precise tool for DIYers on ladders, as sprayers run a high risk of overspray onto your roofing tiles.
Once your gutters are freshly painted and looking like new, protect your hard work. Get in touch with local specialists for premium gutter guards services to keep your gutters clear, safe, and looking great for decades.